Wednesday 24 June 2015

Wednesday Worktable - Wednesday 24th June - More About the Leather Journals

This is my contribution to WOYWW (What's on Your Workdesk Wednesday), over at JuliaDunnit's Blog. Each Wednesday, Julia invites fellow crafters and bloggers to show a photo or two of their worktables, and explain what they've been doing.


This week I've at least managed to get my post written on the right day of the week (after two late Thursday posts)!  However, my desk looks increasingly more scary, as I haven't had time to tidy up; the stuff just gets "pushed back" and new tools and materials put in the newly-created gap. 

My plan chest/ work surface... What a mess!
To the left are some attempts at the new Origami Bows, that are so popular just now. The largest is my first attempt, which wasn't bad, but they did improve as they went along, so that I'm quite pleased with them.  More practice needed, I think, to perfect them.  

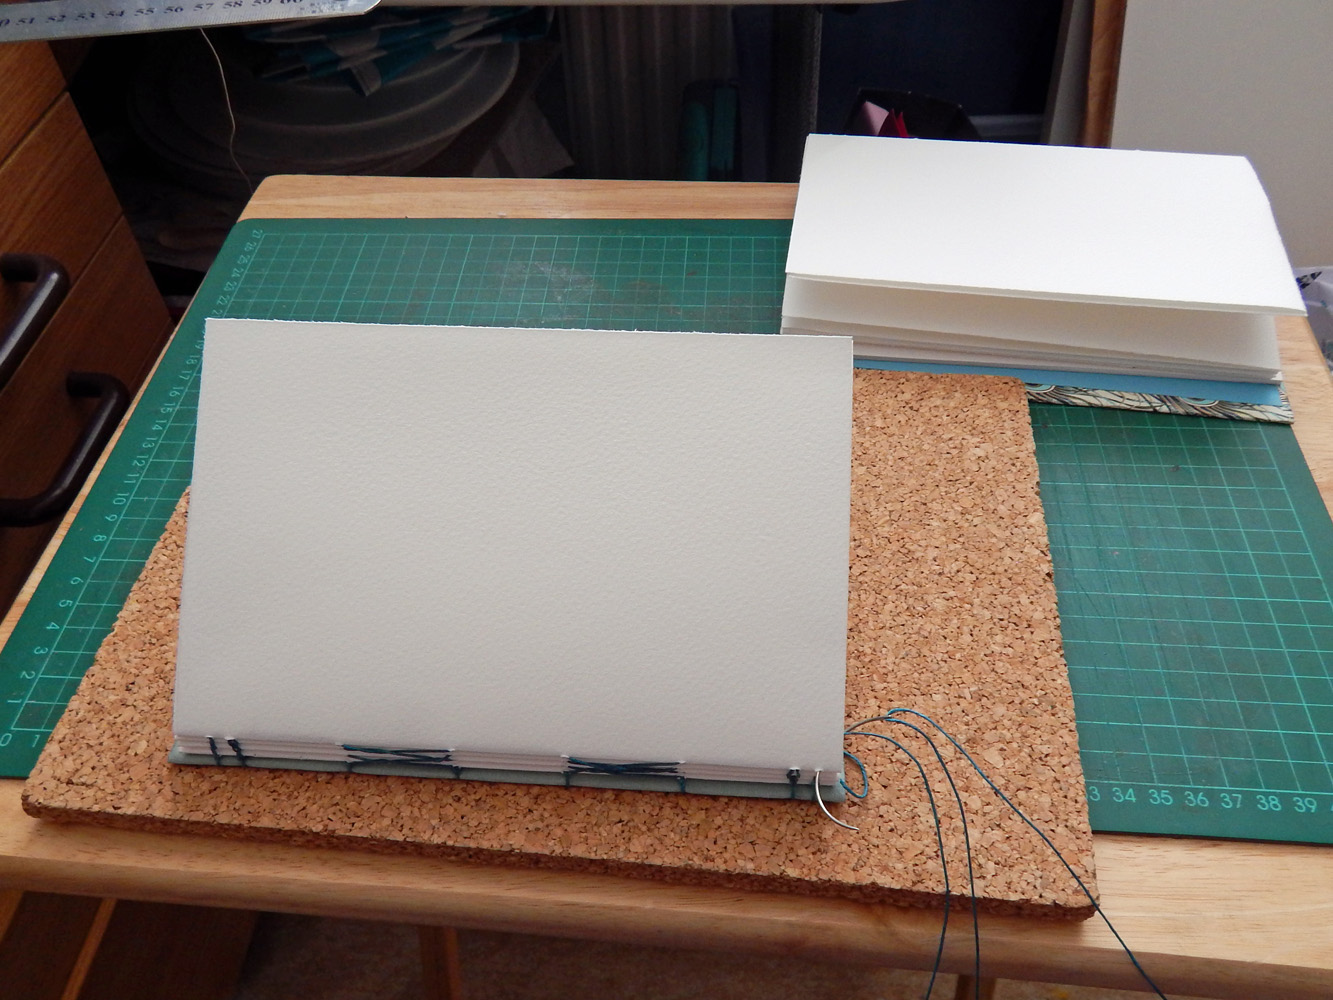
In the middle are various bits and pieces that I was using to make leather journals.
You may have seen last week's post, about two leather journals I was working on...  


The two pieces of leather, from last week... 


 Here they are now, on my little table, almost completed.  


This is the cream leather journal.  It is now bound into its cover and has a gold loop-and-button fastening.  I have also painted the edges of the cover in gold.  


The cover is lined with a dandelion patterned Italian paper, with an ivory background, printed in gold and a green-grey colour.  The pages are my favourite, beautiful crisp cream text paper.  There is one section of paper, with forty pages.  It's stitched with a very soft mossy green linen thread, to echo the green-grey of the lining paper.  

This is just about finished - it just needs to be under weights for a while, so it will sit flat and open nicely.  Then it will be in my shop, for sale. 


This is the duck-egg blue journal - you can see the beginnings of the cover in the photo from last week.  I had cut the leather and painted the feather onto it.  Since then, I've added the piece of wine-coloured suede leather, for a beautiful contrast with the duck-egg of the leather.  

You can see that I had to hold it with a finger, to get a good front-cover shot, as it keeps springing open.  I'm trying to decide if it needs a fastening - we will see how "springy" it still is, after a while under weights.  


Covers are lined with a rather wonderful paper, printed with a marbled design.  I love how the colours echo my choices of leather and suede.  You can also see that the suede strip is folded over, as an edging on the inside of the flap, as well as on the outside. 


The book has two sections of paper, which I bound with a cross-stitch design, in a plum-coloured linen.  


Here is the painted feather, next to the suede strip.  There is a plum colour under the gold of the feather, so it all goes so beautifully together.  I'm very pleased with this book.  

Close-up of the feather - can you see the plum-coloured background in this shot? 


Anyway, this is my work area today.  Seriously messy, but with some good stuff happening. Hopefully I will have some time free in a few days' time, to have a good tidying up session in the studio! 


That's my contribution for this week.  I hope you'll come back and visit again soon. When you've finished browsing around on my blog, do return to Julia's Stamping Ground, to see what's going on elsewhere this week.  

Thanks for Reading! 


Thursday 18 June 2015

Wednesday Worktable - Thursday 18th June - Leather Journals

This is my contribution to WOYWW (What's on Your Workdesk Wednesday), over at JuliaDunnit's Blog. Each Wednesday, Julia invites fellow crafters and bloggers to show a photo or two of their worktables, and explain what they've been doing.

I'm late again... It's Thursday evening and I'm only just ready to write my post. But I'm trying to join in regularly, so here I am.  I was out yesterday evening, at our local Crafters' Club.  I spent my time stitching a pair of tiny trousers... about which, there will be more - eventually!

Meanwhile, on Lizzie's Desk, there is a whole heap of mess: 


Scary, isn't it? 
So, I'll explain a bit... I'm busy making several things at once (that's how I work, I'm afraid, though today it's more messy than normal).  
To the left is a parcel that contains some pretty dresses for my niece's little girls. Must see her, so I can hand them over! 
Then there is a miniature press, which I have used for tiny books, but just now it contains a large flower head, which I'm pressing.  
The clutter of bits is actually the pages for two leather-covered journals, plus linings of patterned paper for each book.  There is also a leather piece, with a practice at painting a golden feather.  And clutter... always plenty of that! 


This is my small table, with two leather book covers, that I'm making.  You can see that the cream leather cover will have a button-and-loop fastening. The duck-egg cover has the painted feather on it.  I'm still working on that... 


Here's the feather!


And wrapped up safely, are four greeting-card notebooks, with all pages cut, ready for binding.  

That's my contribution for this week.  I hope you'll come back and visit again soon. When you've finished browsing around on my blog, do return to Julia's Stamping Ground, to see what's going on elsewhere this week.  

Thanks for Reading! 

Thursday 11 June 2015

Wednesday Worktable - Thursday 11th June (!) - Finished and About to Start...

Hello, thanks for visiting my blog! This is my contribution to WOYWW (What's on Your Workdesk Wednesday), over at JuliaDunnit's Blog. Each Wednesday, Julia invites fellow crafters and bloggers to show a photo or two of their worktables, and explain what they've been doing.

I'm late this week - it's Thursday lunchtime already!! Busy, busy... but I did want to join in and I hope you will all forgive me!

Well, last week I posted about a broken car windscreen, which I'm happy to report was repaired by Thursday evening, so I could go out to our regular Craft Club at the local sewing and quilting shop.  I took along my in-progress bookbinding project, that I had posted about last week: 

 
This! 


It's now completed and you can see it on my desk this morning:


A bit of a messy workspace today...  

So, in the middle is my bookbinding project.  It's actually for ME, just for a change.  I made myself a sketchbook, using one of my favourite cover papers (I do love peacock feathers) and a piece of favourite silk for the edging of the covers.  

A couple of detail shots, for anyone who's interested: 

Front Cover (pen is just for size reference!)

Binding - I used a hybrid Coptic/French Stitch binding, to make it pretty.  Stitched in deep turquoise linen thread.  


Don't know if you can see... the pages are a mixture of cartridge drawing paper (l/h side) and mid-weight watercolour paper (on the right), so I can scribble away, but also add some colour if I wish.  

 
Of course, being for myself, I didn't need to make it 100% perfect.  So, I took the opportunity to use some paper that had been mis-folded when working on a previous commission project.  I don't mind the crease-lines down the edges of a few pages, but I wouldn't want to sell a book that was like this!


And just to return to the Desk...

To the left is a pile of prints, which are drying out.  I wrote about how these came into existence in This Post!  

To the right there are some greetings cards, with designs from Russian/Soviet matchbox art.  In a previous post, I showed a notebook that I had made with a Zebra card...


... I now plan to make a set of these notebooks, as the Zebra looked really good.  


As for the rest of the table... well, it's just clutter. But it wouldn't be an authentic Lizzie Desk, if there was no mess!  

Anyway, this is my contribution for this week.  I hope you'll come back and visit again soon.  Meanwhile, once you've finished browsing around on my blog, do return to Julia's Stamping Ground, to see what's going on elsewhere this week.  

Thanks for Reading! 


Monday 8 June 2015

Printy Inky Messy Day!

I spent last weekend in Cheltenham, Gloucestershire, staying with friends.  However, the reason I was there, was to attend a day of Monoprinting at The Yard Artspace, with Sue Brown.  

We had a really good day, trying a great technique for producing pieces of work, using a sheet of clear acrylic plastic, inks and a small press, with cut out card shapes, pieces of non-absorbent materials (such as lace, textured wallpapers) and dried flowers and leaves.

I enjoyed the day very much and was quite pleased with the results that I achieved. There were four of us, plus Sue and we all produced some very different results, using the same basic techniques.  


The large red area is ink (oil-based relief printing ink) rolled onto a sheet of clear plastic (which just shows up as slightly grey against the magazine behind it).  Over this I placed some torn strips of textured wallpaper - face down.  This was rolled through the press, to leave ink on the surface of the wallpaper.  

Here you can see the strips of wallpaper, with red ink on them, also the plastic, with more red ink.  This time there are two birds, cut from shiny (non-absorbent) card offcuts, plus some dried leaves.  Again, the idea was to transfer ink onto the surface of those items, in order to print from them.  You can see that the birds were inked in yellow for a previous print... 


These two prints were made from a plate inked with deep blue, with the bird shapes and some dried cow parsley placed on top.  Paper was then laid over the whole plate and it was put through the press.  The shapes & flower acted as masks, preventing ink being transferred to the paper (the blue-inked birds and flower were used for another print later).  I then used those red wallpaper strips, over the top of the first blue print.  Work in progress.... 
 

Here you can see the original bird prints, before the red strips were added... also some other basic prints from a blue-inked plate and that red-inked plate that I showed in the photo above, with wallpaper strips on top.  
The second print from the left was made from the plate After the fifth print (the deep blue with outlines of ferns & cow parsley, using the ink that remained after printing and removing the plants from the plate.  The same thing applies to the third and sixth prints, with the birds & cow parsley.  
The fourth print is from a plate that was printed in green, after the plants had been removed; the print was then run back through the press, with the blue-inked plants from the print to its right, thus making a second print on top of the green.   
In this way, prints were worked and re-worked, to build up layers and patterns.  I was very pleased with some of the results... 

Left) A basic one colour print, with the shapes of cow parsley and ferns showing as white paper (where they had been placed on the plate, to act as masks). 

Middle) The red print with yellow birds and white leaf outlines was made by re-printing the red-inked plate, after removing the wallpaper strips, birds and leaves.  I inked up the birds with yellow ink (by rolling the ink directly onto the bird shapes) and placed them over the empty area where the original masks had been.  The whole was rolled back through the press (with a sheet of paper!), to make this impression.  

Right) The right-hand print has been worked in several layers.  First a red print, from the inked plastic sheet.  Then a green-inked plate; I scratched a design into the green ink, then placed a dried flower and the leaves over the green ink, before printing again onto the red print.  I then re-printed by laying the blue-inked ferns and a piece of plastic mesh - also inked with blue - directly onto the printed paper, covering with scrap paper (magazine paper is shiny and doesn't stick), then rolling through the press


Various attempts at producing interesting layered images. 
I also tried a print in silver, onto kozo tissue paper - a loose-textured hand made paper.  I wanted to see what would happen.  In fact, it made a very good impression, though the ink soaked through the paper.  I hope to float it on glass, in a frame, so that the print can be seen, as I think it looks pretty nice.  
The third print from the left is an attempt at collage.  After printing in silver, with various feathers, leaves, flowers and pieces of handmade paper as masks, I attached some of the mask items to the print.  Not sure about this one... I'll leave it a few days and then take another look.  


Layers...and no layers - the blue print is just a second impression from a blue-inked plate, after the mask items were removed.  It's very simple and I really like it.  


And more experiments...  The left-hand item is an experiment in print and collage, using a page from a magazine as the support, then overprinting with red, green and silver and finally adding collage elements.  Again, I think it needs a few days before I can decide if I like it! 

So, those were my own pieces of work.  I have mixed feelings about the end results, but the process itself was good fun and a very rewarding experience.  I'm very grateful to Sue, who is a great teacher and very nice person! 

The others didn't mind me photographing some of their work to show you.  However, I'm afraid I am hopeless with names and I have forgotten all but one...and there were only three to remember! I do wish I'd written their names down. Sorry ladies!


Some beautiful results from experiments with ferns, snowdrops and allium flowers.  Also simple shaped masks, overprinted with different colours.  I like all of these very much! 


The four prints to the right of this photo are Sue's demo prints, using cut-out shapes, dried flowers and textured wallpaper.  
The other seven prints belong to Kate, who used leaves, flowers and strips of textured paper, also a bird cut-out.  I love how she has achieved some very delicate prints from her inked-up leaves and flowers.  Also the lovely results from the textured paper - not sure how she achieved the orange... by careful over-printing I think.  Really lovely prints! 

 
These landscape-like prints are really quite fabulous!  The artist used masking and overprinting to produce the layered-up prints.  They looked even better in real life.  You can actually see their creator through the window there - making herself a cuppa! In her "day job", she is a printmaker, who creates work inspired by Dartmoor - the area near where she lives.  I just wish I'd asked her to write down her name, website etc... So silly of me. 

Anyway, thank you for reading.  If you've made it this far, you have done really well!  I hope you enjoyed seeing what can be achieved, with a sheet of plastic, six colours of ink, a printing press and some bits & pieces.  Such different results from five people, all using those same materials! 

* * * 


And just for a change... some Bunny cuteness!  This is my friends' house-rabbit. Her name is Cassie (though everyone calls her "Bunny") and she is ten years old and still going strong.  She sleeps all day, but can be very lively in the mornings and evenings - especially on warm sunny days.  


Wednesday 3 June 2015

Wednesday Worktable - 3rd June 2015 - A Birthday Present for Me!

Hello, thanks for visiting my blog! This is my contribution to WOYWW (What's on Your Workdesk Wednesday), over at JuliaDunnit's Blog. Each Wednesday, Julia invites fellow crafters and bloggers to show a photo or two of their worktables, and explain what they've been doing.

Last week we were celebrating 6 years of WOYWW... but, after all the cheers,cake and champagne (we wish!), special blog buttons and celebrations, we're back to a Normal Wednesday today.

Well, nearly... It's not quite normal for me today.  This is what happened while I was getting dressed this morning: 


A stray shoe (kicked by a small boy) smashed my rear windscreen! 
Windscreen people coming to fix it tomorrow afternoon.  Meanwhile, my wonderful and lovely neighbour lent me her car, so I could pick J. up from his exam at school. 


But, we soldier on!  Having spent the first half of my morning on the phone, arranging a repair and re-arranging my day, I found my camera and took a couple of photos for you.  This is what's going on in my Studio today: 

The usual clutter! (what someone last week called "push-back"!).  But wait! There is a gap in the middle..


...because I'm binding a book and using my small table.  Sometimes it's more comfortable to sit at this low, folding table, while I'm binding a book.   
This is a special book.  It's actually for Me!  I decided it was time I made a book for myself.  I have a few notebooks that I made, which were not quite perfect, so I kept them for my own use.  But this time... This Time, I am making a special Sketchbook, just for myself, from scratch.  The plan it to use it at the weekend, when I go away for a printmaking day and a nice couple of days with friends.  


And, just in case you want to see... just one more card that I've made! This is 4" square and I think it will be a birthday card.  Quite cute, eh? 

So, that was my contribution to WOYWW.  When you've seen enough here, do go and see what everyone else is doing today.  

Oh, and if you're interested, I posted about the completed Baby Journals that I was working on last week.  Find them here


LinkWithin

Related Posts Plugin for WordPress, Blogger...