Having made myself a nice stack of pages, I wanted to make a little book, with a simple binding. I thought I would take photos and make a tutorial, so you could have a go yourself. This is Part Two of three posts, designed to show you how to make the hand-torn codex and then turn it into a little journal or notebook, with a traditional Mediaeval Codex Longstitch Binding.

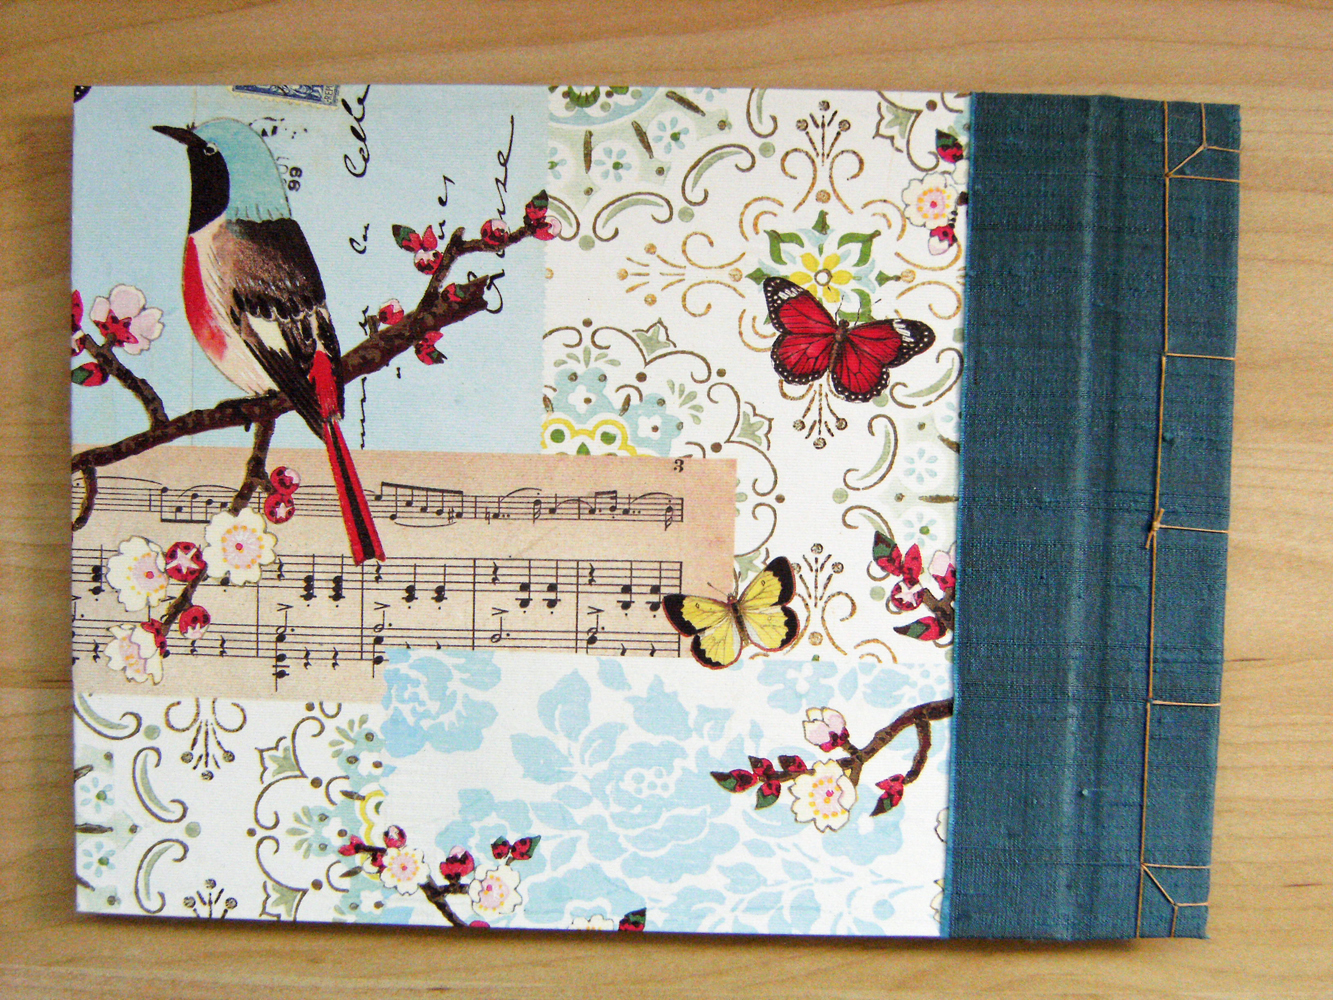
Three books with a Mediaeval Longstitch Binding
PART TWO OF THREE: PREPARING THE COVERS

Soo... at the end of our First Episode, Intrepid Reader, we had made a nice pile of folded pages, ready to bind into a book. This is our Codex!
Choosing the Cover
I used a piece of lovely suede leather for my book cover. You could use fabric, or a sheet of paper; some colourful hand-made paper would be lovely for this kind of cover. It just needs a little bit of weight and stiffness to it, so it will stay stiff enough to hold its shape and make a nice binding.You can line paper with other paper, if you want to - in which case, I suggest you use another handmade fine paper, as you shouldn't get problems with it curling up due to "crossed grain"! I don't want to go into grain any more in these posts, but if you are unsure about your chosen paper, try this link to test it for "grain direction" and then try to make sure you stick the papers together with both their grains running vertically.
If you fancy using fabric for your cover, you may like this tutorial about Hand-lined Bookcloth. You can also line the fabric with paper using the method described below, but you need to be careful not to soak the paper, or the glue might come through the fabric and it may show as a stain-mark.
Alternatively, you could make a longstitch binding with a piece of lined embroidery, a hand-quilted panel or perhaps something like felt - wool felt is especially nice for a project like this and a decent quality felt probably won't need lining, unless you want to.
* * *
Cutting the Leather


I am lucky to have quite a few lovely pieces of leather just now. Some are actual "leather" with a smooth, or grained surface, but most are pieces of suede - various thicknesses, but many are thin and need to be lined before I can use them.
I chose this piece of suede, in a deep wine red colour: 

I rolled the codex along the leather, to make sure there was enough to make the covers. It needs to be twice the width of the codex, plus its thickness (but that will be when it's a bit pressed down, as the binding will pull the sheets together), with a small amount extra for a "lip" at the front edges (you know, the bit that sticks out slightly beyond the book pages, so you can open the book easily etc).
The leather also needs to be as high as the codex, plus another little bit for overlap at top and bottom.
Having made sure there is enough width for the cover, lay the leather out on a cutting mat, making sure it is "square" (at least on one side).
Lay your ruler along the line where you wish to cut and make sure it will be deep enough all over (if the leather is not square at the top, you may end up with a piece that is shorter at one end than the other - you do need to make sure you allow for "squaring off" after cutting!).

This is my rotary cutter. I find one of these very useful for cutting bookcloth and leather. It's easy to be accurate and it gives you a good straight cut, with no snags.
If you don't have one, then a good - very sharp! - craft knife, or a large pair of good scissors will do just as well. To cut with scissors, score along the inside of the leather (with a bone folder or rounded edge of your scissors), or draw a line with a pencil, then cut carefully along the line, making long cuts so you don't snag the leather and make the edge rough.

Cut carefully along your line, making sure you leave that extra space for the overlaps at top and bottom. Hold the ruler firmly, so it doesn't slip and make your line wobble.
If your leather needs "squaring off", then do this now. A set-square or quilter's square would be a very useful tool to help you with this. Or you could use the board from the back of a large A4 pad of paper - they are pretty well squared off by the cutting machine. Failing that, measure carefully! Of course, it doesn't have to be 100% square - it just needs to look right!
* * *
Lining the Leather


You can use a variety of papers to line your leather. I was choosing between a fine Japanese kozo tissue, that I sometimes use to make bookcloth, a hand-made mulberry fibre paper and a piece of fairly lightweight scrapbooking paper.

Cut the paper to fit your leather piece. It should fit just inside the edges, with a tiny margin all round.
If you are cutting very thin paper, such as mulberry, you need to be careful not to rip it unevenly. Crease it on the cutting line and either use a very sharp craft knife with a metal ruler, or a long-bladed knife to slice through the fold (you can use one of those snap-off blades, extended out to make a long knife), or else good sharp scissors. You could also use the "wet tearing" method that I used for the book pages (see the previous tutorial).

Lay your paper wrong-side-up on a larger piece of scrap paper - or a non-stick surface that you can clean.


Apply your glue with a brush, using a "sunray" sort of pattern, to cover evenly.

Lay the gluey paper sticky-side-down on your leather. Line it up with the edge, then gently let it down, so it doesn't crumple up, or stick fast. This should then allow you time to lift and re-postition it, then smooth it properly into place.
Stiffer papers are easier to position, as they don't flop around so much. You may want to hold a stiffer sheet flat with both hands and line it up just above the leather, before gently putting it on top, all at once.
You do need to work reasonably quickly with pva glue, even when diluted, as it dries quite quickly. This is handy, as you don't have to hang around waiting for things to dry, but it means you need to be careful not to drop sticky paper onto a surface and press it down, until you have the positioning right.
You can add a little methyl cellulose to your pva, to slow drying time and make it easier to spread (I haven't tried this); or you can use EVA, which is slower to dry. Most craft glues are pva though and they come in different dilutions/consistencies, so check what yours is like before you dilute it.

Once you are happy with the general position of the lining paper, smooth it out with a bone folder, or other smoothing tool - or use the flat of your hand. Smooth from the centre, to the edges, removing bubbles and creases.
The photo shows me using a piece of non-stick paper to protect the fine mulberry tissue that I was using. Make sure the paper really is non-stick though!

Mulberry papers and other tissue-type papers can become very fragile when wet and gluey. Protecting the paper with a piece of non-stick paper (silicone or waxed paper, or non-stick baking paper will do), helps to avoid rips in your lining paper - like that little snag in the photo above.
A small snag won't show, but a big rip would be a bit disastrous. The protective paper allows you to smooth it firmly, without worrying that you'll catch your paper and tear it.
You may see that the paper above looks darker and patchy. This is partly because it's still damp, but also because the suede is a dark colour and it shows through. It should look more even once it's dried - and it doesn't really matter if the leather shows through, as it just adds to the interest of the book's appearance. If that does bother you though, choose a more substantial paper for your lining.
* * *
Making a Spine Stiffener
It's easier to bind the book if you have a stiff spine. This gives the binding structure. It allows you to position the sections of the book more accurately. It also defines the spine of the book and helps to give it shape.
If the leather (or other cover material) is very heavy or stiff, you may not wish to use a stiffener, but I recommend that you do so for at least your first couple of attempts - it just makes the job easier!

Hold the codex firmly, squeezing the folded edges together slightly, as they should be once the book is bound. Then measure the depth of the codex, using either a ruler with fine divisions, or else a pair of dividers - set to the distance from the central folds of the two outside sections.

Cut a strip of board - grey-board, "chipboard", thick cereal box, back of a writing pad... something stiff enough to support your binding and allow you to make holes and sew through it, without it collapsing.
Make the strip the same width as the measurement you took from the pages. Then cut the strip of board to just a bit shorter than the height of your pages.


Optional extra - I decided to cover the strip of board with paper, to match the lining paper of the covers.
The stiffener will be attached to the inside of the cover, with the book sewn onto it, so it won't really be visible, except at its edges when the covers are opened and a glance of it between the book sections when the pages are being turned.
However, I wanted the stiffener to match the cover and it wasn't much effort to wrap it with matching paper. Notice that I didn't cover its back - this will be stuck onto the lined leather anyway.

The stiffener will be stuck inside the covers, like this.

Before sticking this down, you need to do a number of things:-
First, lay the stiffener on your mat and measure around 1cm - 2cm (3/8"-1") from either end (depending on the size of your book - this was a little book, so 1cm was good).
Mark a line of dots, spaced at regular intervals across the stiffener, one for each section of the book. You can use a pair of dividers to set the spacing, so you make it the same every time. I did mine by measuring with a ruler - it worked fine.
You also need a set of holes for the inner set of stitching - the "Longstitch". I made one set of holes 4cm (1.5") from each of the first line of holes - or 5cm from either end. These were nicely spaced on the spine, with a gap of 5cm between them, so the stitching would look balanced.
Working this out is partly practice, partly aesthetics and partly "what I like". You may like to cut some paper strips the same size as the stiffener and play around with the spacing of the holes. The main thing is to have the first set of holes close enough to the top/bottom of the book, that the pages are well attached - yet not so near the ends that it is difficult to stitch, or the leather/board might split etc.
The other holes need to be placed in consideration of the type of stitching (it can't be "longstitch" if the two sets of holes are too close to the centre!) and also evenly spaced from either end.
And after all, if you don't get it right, then you will still have learned something valuable for next time!
* * *
I recently posted on Alisa Golden's blog - her post about making a "Cigar box". I commented that I was so pleased to see how to make a box "properly", as I had spent a considerable amount of time the previous week, making a box. My method had been very hit-and-miss; it came out well in the end, but at first it fell apart. This is part of her reply, which I think is useful advice:
"If your box came out, then your "properly" is just as good as my "properly." It's great to learn by doing (and you probably learned a great deal!), although it can take a bit longer."
* * *

Before you stick the stiffener into the covers, cut a piece of stiff paper or spare board. It needs to be exactly the height of the pages (even if that makes it taller than your stiffener). Centre this on the board, alongside the dot-marked stiffener and copy the positions of the dots onto one edge of your strip. This will be your template for making the holes in the pages.

Draw a vertical line to show you where to stick the stiffener on the cover. I prefer to measure to the centre, then draw the line half the width of the stiffener away from this centre point. This means that you can stick the piece of board on the cover, using the line as a guide for one edge of it (rather than trying to get it centered over the middle of the cover.
If you want to, you can draw a very light "middle line" as well, so you can check it is centred at the top and bottom - or you can use the guides on your cutting mat for the same purpose).
Basically you need it centred, so that when you stitch the book together, the covers are of equal width, both front and back.

Then use a pricking tool, large needle (held in a cork or with a rubber band for grip), a bradawl - whatever you can use to make holes of the right size for your sewing needle. Be careful not to punch the holes so wide that they begin to join up; but they need to be as thick as your binding needle, or it will stick and break.
Remember to go right through the leather as well. You may find it helpful to have a pile of newspaper, scrap paper or a foam pricking mat underneath. It should be fairly firm though, or the stiffener will bend and get damaged. Mind also, that you don't break your needle/awl, by pushing it too hard.

Check that your holes have gone all the way through.
* * *
Making the Holes in the Pages

Now you can use your template to help you make the holes through the pages. Open out the set of pages, making sure that they are all lined up at the top; then place the template alongside the fold line. Push the pricking tool right through the pages, on the fold.

If you have an old phone book - or other non-valuable old book - you can use it as a "cradle", to hold the paper while you punch holes through. It is a useful tool, as the creases in the pages will drop naturally into the space where the book is opened, keeping them all together and lined up.
The little gap underneath the pages, made by the book, will make it easier to push the pricking tool through the paper. The old book pages will get full of holes from your needle, but it won't matter, as it's an old book!
Some people spend a lot of money on book cradles, so they can easily punch the holes for their books. However, if you're only making a few books, this is a free alternative. My old Yellow Pages is definitely one of my favourite bookbinding tools!

Close each section again and lay them on top of each other, making certain to place each section the same way round - so that the tops all match. Double check that all the holes are there and that you've put them in the right places. If you want to, you can place the pile of pages under something heavy to flatten them - but it probably isn't necessary, especially if you already did that after tearing and folding the sections (first part of the tutorial).
* * *
Once this is done, you are ready to bind your book - which will be covered in the next part of the Tutorial. I hope to complete this and publish it very soon!
I hope this was useful and interesting. There's a lot of information here, but I think that after you've done this once, it will seem quite straightforward the next time.
If you think I've left something out, or an instruction is not clear - or coherent(!), please feel free to ask me your questions. I'm not an expert, but I will find out the answer if I don't already know it!
Thanks for Reading!